When it comes to creating animated prototypes for websites and mobile apps, our design team normally prefers using tools like InVision and Adobe After Effects. Nevertheless, we’re always open to experimenting and often try alternative UI prototyping tools, especially when we have to deal with unusual tasks.
This time, we decided to explore Muse, a website building tool from Adobe. Let’s see how it worked out.
The case
The team needed to present a fully functional landing page for an elite eyewear company’s website. The page is a long read featuring several scroll transitions (including parallax scrolling effects), a product catalog, and headlines and photos appearing with “fade in” and “fade in up” effects.
Why Muse?
Adobe After Effects was simply not the right tool for the task. Although animating such a page with After Effects would take comparatively little time, we still wouldn’t have got a fully functional website prototype with working transitions and scroll effects.
InVision, in its turn, doesn’t support parallax scrolling effects, and our prototype had to rely on these effects heavily.
So, we needed a tool designed specially for creating responsive websites and able to preview prototypes right in the browser.
“Create gorgeous HTML5 websites without writing code,” the headline on the Adobe Muse’s homepage was saying. It seemed to be exactly what we were seeking for.
Muse allows creating text headlines, paragraphs, buttons, input forms, blocks of media content and more right on the fly. Actually, you can build a whole website from scratch using Adobe Muse, but it can deal with a landing page prototype no worse.
Adding content and working with parallax effects
The landing page mockup was created in Sketch. Then, the content was exported as .svg and .png files which are fully compatible with Muse.
Next, we had to add scroll transition effects to the page. In Muse, working with scroll transitions is operated via the “Scroll Effects” toolbar that contains motion, opacity, slideshow and animation settings.
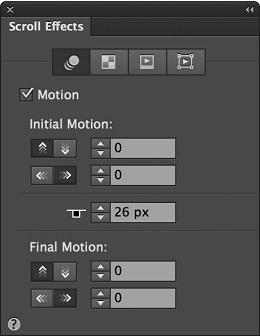
Setting motion speed in the Scroll Effects toolbar in Muse
Here, to create parallax scrolling effects in Adobe Muse, as well as “fade in” and “fade in up” effects for appearing elements, we needed only to play with motion and opacity settings: the former allows to set the initial and the final values of the scrolling and fade effects’ speed, and the latter does the same for the animated elements’ opacity.
It’s pretty simple, but it may take some time to experiment with different values’ combinations before you get a smooth result.
Adding CSS animation effects to the prototype
The “Scroll Effects” tools in Adobe Muse allow to create smooth and beautiful parallax scrolling effects, but we also needed to include several animated headlines to our prototype which wouldn’t depend on the scrolling speed.
To do this, we linked jquery and animate.css libraries to the prototype using the WOW.js plugin. Here’s a video that explains how to do it in detail:
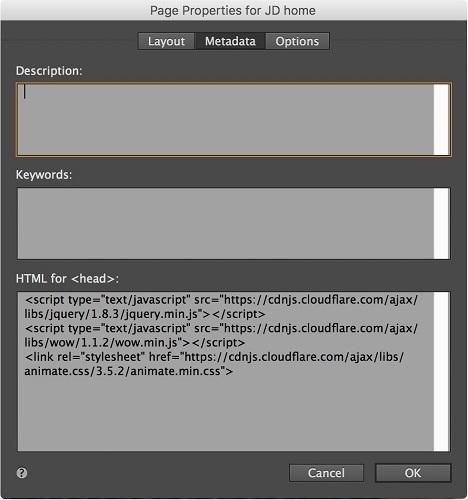
Muse allows to assign classes to the created elements and to insert an HTML code right into a page and into the <head> container.
A few more valuable features
Adobe Muse also allows to adding anchor tags that allow a user to jump to a specific location on your page. Anchor tags are often used to create a navigation bar for landing pages.
“Scroll Effects” toolbar is active only when you have a fixed page width. Thus, if you want to make your prototype adaptive and to apply scroll effects to all the elements, you’ll need to set and adjust breakpoints. Breakpoints mark the segments of the screen that can change their proportions or disappear completely depending on the screen or the browser’s window sizes.
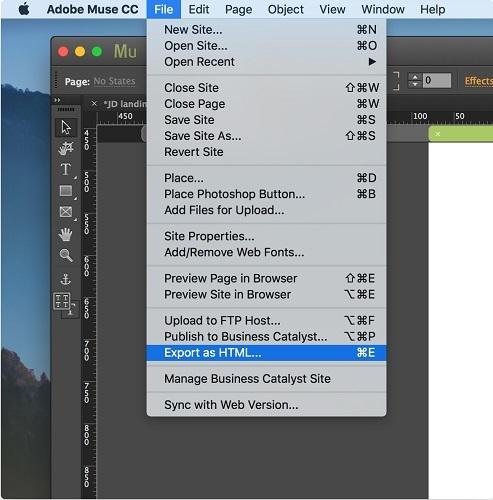
Exporting the prototype as a .html/.css file
As soon as the prototype was ready, it was time to hand it over to our web development team, so they could prepare it for the presentation in the actual web environment.
Adobe Muse can export a prototype as a .html or a .css file, which means that our web developers got a full-fledged website organized as a set of containers. Thus, the developers had only to edit the existing and add new elements.
Final thoughts
Of course, working on this landing page, we weren’t able to explore the full potential of Adobe Muse, so, for now, there will be no ultimate conclusion. We continue testing Muse and have already rated it as an alternative to the usual tools we use for creating prototypes for desktop apps and websites.
The tool is not flawless, though. It really lacks libraries for layers’ animation, the possibility to work with masks, and the “Scroll Effect” toolbar is not as intuitive as it can be.
Yet, I’d recommend trying Adobe Muse if you want to build a prototype functionally close to an actual website and have no experience of using other similar tools - Muse is quite friendly for the newcomers, yet quite functional to appeal an experienced designer.
Links: