We've already written about choosing an Ad monetization solution, and now it's time to discuss the issue more specifically, with examples. We'll talk about our experience in working with one of the most effective advertising platforms, describe its pros and cons, argue the choice made - and, of course, we'll reveal all the important nuances of integrating the SDKs.
So, let's begin!
Why choose InMobi?
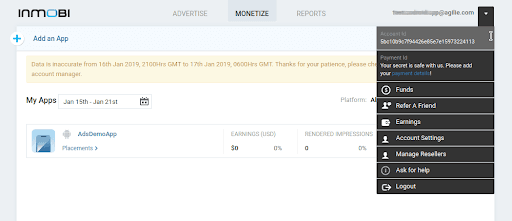
InMobi is one of the top app monetization platforms and has a lot of nice and useful benefits. Among other things, even a test account provides various advertising content (so that you can properly test the offered solution). Also, we were really impressed with the convenient import/export filtering settings between placements: you need just a couple of clicks to import (or export) filtering into the current placement from another one.
So, agree: there is a certain reason explaining the popularity of ads from the InMobi.
But let’s be more specific.
InMobi pros:
-
A large number of targeting filters to be used both in the admin panel and on the client side.
-
A good choice of types of advertising and the possibility of their free configuration on the server.
-
A quality SDK, which allows preloading ads (if you need a delayed display) and automatically collects geolocation data. Moreover, the management of this data collection process can be performed from the server (admin panel), without the need to come up with complex remote control mechanisms.
-
A worthy SDK out of the box which is able to update banner ads (also automatically) and show native advertising of any custom size (given the chosen aspect ratio).
-
An opportunity to complain about the advertisement and its advertiser (which may come in handy in many cases).
-
A possibility to integrate with other popular platforms, such as:
-
Appodeal
-
AdMob
-
Heyzap (Fyber)
-
MoPub
-
ironSource
-
-
Access to well-detailed documentation.
But before explaining how to set InMobi, we'd like to list the cons of the platform either - otherwise, our InMobi Integration Guide won't be complete.
InMobi cons:
-
Banner advertising allows using only predefined sizes (you won’t have a chance to set your own proportions).
-
The need to add the Picasso library to Dependencies. Also, when upgrading Picasso, you should take into account that the methods used by this advertising platform are still supported in the new Picasso version.
And yet, as you see, pros prevail over cons. And the main one is the fact that InMobi SDK allows you to monetize your app and perform the task very effectively.

InMobi Integration Guide
And now we're going to point out to you the process of integrating the SDKs and setting up the InMobi platform.
#1
To use the platform, you must register and get the key.
#2
Next, to connect to the project:
a) Include this in your top-level build.gradle file:
allprojects {
    repositories {
        jcenter()
    }
}
b) Add the following line to the dependencies element in your application module’s build.gradle.
dependencies {
   implementation 'com.inmobi.monetization:inmobi-ads:[SDK version]'
}
c) Sync your Gradle project to ensure that the dependency is downloaded by the build system.
In the above example, you should replace [SDK version] with the number of the current SDK version which you’ll find here. In addition, you can download the latest SDK as a jar file and do the job manually. In other words, you should put the jar file in the libs folder (application level) and add the dependency to build.gradle:
dependencies {

  implementation fileTree(include: ['*.jar'], dir: 'libs')

}
If you’re taking advantage of Android Studio, you may add dependencies using the menu. The scheme of your actions would be simple: select Project Structure in the side menu, find your application in the Modules tab, go to the Dependencies tab, and choose jar dependency in the left menu. Now all you have to do is specify the path to the downloaded jar file.
#3
If you’re interested in integrating the SDKs and working with the platform, you'll also need Google Play Services connected. To achieve the goal, you have to add these services to the build.gradle dependencies:
  implementation 'com.google.android.gms:play-services-base:[lib version]'

  implementation 'com.google.android.gms:play-services-ads:[lib version]'

  implementation 'com.google.android.gms:play-services-location:[lib version]'

  implementation 'com.google.android.gms:play-services-plus:[lib version]'
And, of course, don’t forget to replace [lib version] with the required version. List of versions you can see here.
Talking about AndroidManifest: add the following element to your application manifest.
<meta-data android:name="com.google.android.gms.version"

android:value="@integer/google_play_services_version" />
Besides, you need to add (if they are missing) the following permissions to AndroidManifest:
- to be able to connect to the Internet to download ads from the InMobi:
<uses-permission android:name="android.permission.INTERNET"/>

<uses-permission android:name="android.permission.ACCESS_NETWORK_STATE"/>
- to use Geo-Targeting:
<uses-permission android:name="android.permission.ACCESS_FINE_LOCATION" />- to use multimedia advertising:
<uses-permission android:name="android.permission.READ_CALENDAR" />

<uses-permission android:name="android.permission.WRITE_CALENDAR" />

<uses-permission android:name="android.permission.WRITE_EXTERNAL_STORAGE" />
You should also pay special attention to the fact that you need to add the Picasso library to the dependencies to work with InMobi because the platform uses it to process images.
Add it to Dependencies (to build.gradle):
dependencies {

  implementation 'com.squareup.picasso:picasso:[lib version]'

}
And, again, replace [lib version] with the required one. You’ll find the current version of the library here.
#4
After we've figured out how to set up the InMobi project, we can proceed to the initialization and use of the platform in the application.
Initialization of the SDK is best done in the onCreate method of the Application class. First of all, we need to create a JSONObject object and add the necessary parameters to it:
val params = JSONObject()In order to indicate whether there is permission to collect and use customer data, you need to add the parameter InMobiSdk.IM_GDPR_CONSENT_AVAILABLE. The parameter can be true or false depending on the presence of permission.
params.put(InMobiSdk.IM_GDPR_CONSENT_AVAILABLE, true);Next, we indicate whether GDPR regulation is applied. To do this, add the GDP parameter (which takes the values “0” - YES or “1” - NO) to the initialization parameters:
params.put("gdpr", "0");Then we perform initialization using the application key that we’ve received during registration, and the parameters we’ve specified:
InMobiSdk.init(this, "Insert InMobi Account ID here", params);In the above example, "this" means Application.
By the way, here you’ll read about what GDPR is and why it might be needed.
#5
Point number 3 of our InMobi Integration Guide is additional settings.
If you want to use Geo-Targeting, there are two options: 1) the SDK would receive information about the user's geolocation automatically; 2) we can transfer the user's location on our own. The parameter is regulated in the site’s admin panel.
If you decide to specify user locations yourself, choose one of the ways:
-
Transferring user location data:
InMobiSdk.setLocation(locationObj);locationObj is an instance of the class android.location.Location.
- Transferring three values (city, region, and country) to the following method:
InMobiSdk.setLocationWithCityStateCountry(“city”,“state”,“country”);Targeting by gender and age of your audience is also possible. These parameters can be set as follows:
-
Setting the user gender:
InMobiSdk.setGender(gender);Gender can take the value of the InMobiSdk.Gender.MALE and InMobiSdk.Gender.FEMALE constants.
-
Setting the age of the target audience:
InMobiSdk.setAge(age);An integer value is used as the age variable.
By the way, we may specify the gender using the interval below:
InMobiSdk.setAgeGroup(range);As an interval value, use one of the following constants: BELOW_18, BETWEEN_18_AND_24, BETWEEN_25_AND_29, BETWEEN_30_AND_34, BETWEEN_35_AND_44, BETWEEN_45_AND_54, BETWEEN_55_AND_65, ABOVE_55
And, of course, there are other parameters to determine the target audience:
InMobiSdk.setAreaCode("080");

InMobiSdk.setEducation(Education.HIGH_SCHOOL_OR_LESS);

InMobiSdk.setIncome(1000);

InMobiSdk.setPostalCode("122009");

InMobiSdk.setLanguage("ENG");

InMobiSdk.setInterests("dance");

InMobiSdk.setEthnicity(Ethnicity.ASIAN);

InMobiSdk.setYearOfBirth(1980);
#6
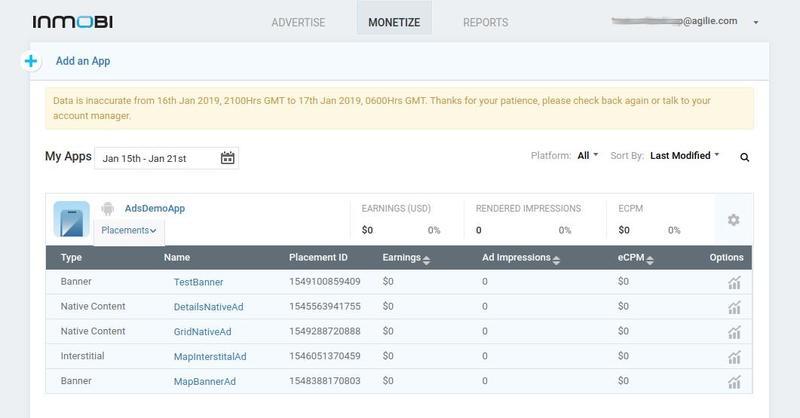
To work with ads from the InMobi, the placement ID should be used. You get it in the process of adding the type of advertising to the admin panel of your application.
#7
Now we’ll start the integration of various types of advertising in the application. After all, the InMobi SDK allows you to monetize your app, and that's what we're going to make true.
Interstitial Ad
To display Interstitial ads, we need to create an instance of the InMobiInterstitial class responsible for this type of advertising.
val interstitialAd by lazy {
  InMobiInterstitial(
      this,
      INMOBI_INTERSTITIAL_PLACEMENT_ID,
      interstitialAdEventListener
  )
}
The class takes as parameters the following values:
-
Context
-
Placement ID for this type of advertising, which we take from the console
-
An instance of the InterstitialAdEventListener listener class in which we override the following methods depending on the behavior we need:
-
onAdLoadSucceeded
-
onAdLoadFailed
-
onAdDisplayed
-
onAdDismissed
-
val interstitialAdEventListener: InterstitialAdEventListener = object : InterstitialAdEventListener() {

  override fun onAdLoadSucceeded(ad: InMobiInterstitial) {
  }
  override fun onAdLoadFailed(ad: InMobiInterstitial, status: InMobiAdRequestStatus) {
  }
  override fun onAdDisplayed(ad: InMobiInterstitial) {
  }
  override fun onAdDismissed(ad: InMobiInterstitial) {
  }
}
After we’ve initialized the required classes and redefined the listener methods depending on the application behavior, we must call the load () method on our instance of the ad class to load the ad:
interstitialAd.load()
We track the ad loading process in the listener class instance we created using its methods:
-
onAdLoadSucceeded
-
onAdLoadFailed
When we receive a callback on the completion of loading an advertisement, we can call the show () method to display it:
interstitialAd.show()
Native Content Ad
Discussing ads from the InMobi, we cannot ignore the Native Content Advertising. More, it’s perhaps the most interesting type of advertising (at least, from our point of view).
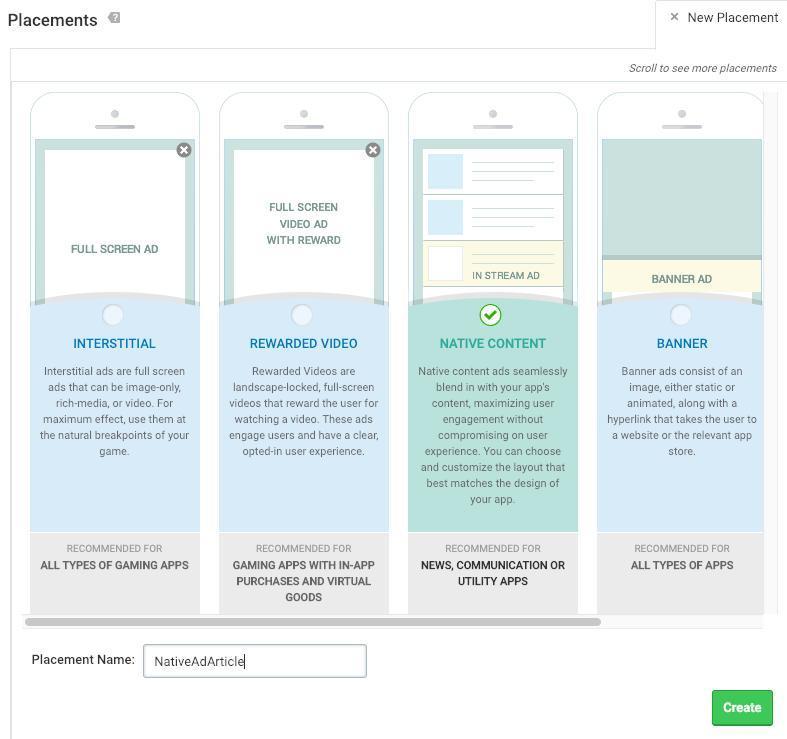
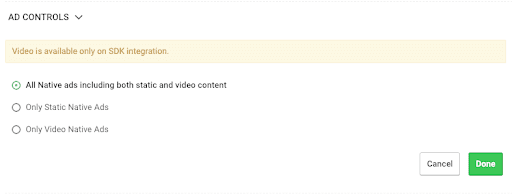
After the obvious stage of creating a Native Content Ad, its further customization becomes possible. The first thing you're allowed to do is choose what type of content should be displayed: video and images, only images, only video.
Then you should choose one of 4 available subtypes for further customization: Preroll, Feed, Splash, and Other (for Chinese users). We took advantage of Feed.
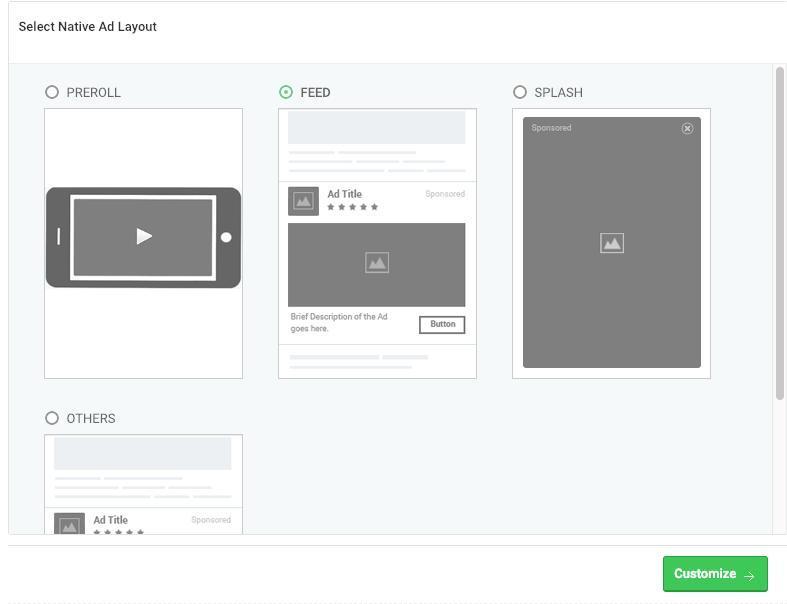
The main feature of this advertising type is the possibility to choose one of the possible aspect ratios in the admin panel. And so we did.
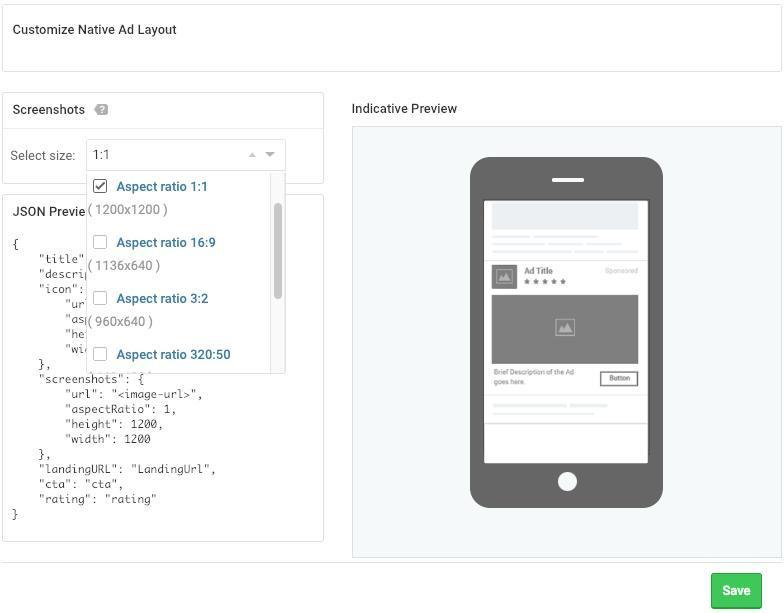
Then we transferred the desired width (in pixels) to the SDK, and the SDK returned the finished View which included the advertising content (video or image) and had the height in accordance with the specified aspect ratio.
Such an approach is convenient if you need customization of advertising View for various sizes. We used it to place ads in one of the three-column RecyclerView cells with a GridLayoutManager. But there is a small drawback: the selectable aspect ratios are mainly focused on the oblong size (such as 3:1 or 16:9). So we chose the 1:1 ratio, it was most suitable in our case (with a ratio of cells close to 11:16).
The main settings in the admin are finished. And now, when you know how to set InMobi, you can feel free to start writing code. However, first, we need to get an object of class InMobiNative.
val inMobiNativeAdListener = object : NativeAdEventListener() {

  override fun onAdLoadSucceeded(ad: InMobiNative) {
      addNativeAdView(ad)
  }

  override fun onAdLoadFailed(ad: InMobiNative, status: InMobiAdRequestStatus) {
  }
}

val inMobiNativeAd by lazy {
  InMobiNative(this, INMOBI_NATIVE_PLACEMENT_ID, inMobiNativeAdListener)
}
Then it's time to download data from the server. It means we have to call the load () method from the resulting object
inMobiNativeAd.load()

//In the NativeAdEventListener implementation, upon successful data loading,
//we pass the resulting object to the addNativeAdView (InMobiNative) method.
fun addNativeAdView(ad: InMobiNative) {

  nativeAdContainer.addView(
      inMobiNativeAd.getPrimaryViewOfWidth(
          context,
          nativeAdContainer,
          nativeAdContainer,
          inmobiNativeAdWidthPx
      )
  )
}
You’ll find a full description of the getPrimaryViewOfWidth method here, in the Native Ad APIs paragraph.
That's all, the ad is shown with the given width and height. To facilitate perception, the example uses a simpler way to add advertising content to the screen than the one we took advantage of for RecyclerView.
Using the resulting object of the InMobiNative class, you can get such elements as the advertisement icon, title, description, rating, text for the button (or any other element aimed at user interaction), a link to the landing page, etc. And, of course, the class allows you to call a method to go to the landing page in question.

Conclusions
Now you know everything about integrating the SDKs and the process of proper InMobi configuration. And before summarizing our InMobi Integration Guide, we'd like to substantiate the choice made once again and talk about the pitfalls we’ve faced.
The first thing that caught our attention at InMobi was the claimed variety of types of advertising provided. After reviewing them all (their descriptions and examples), we proceeded to the SDK documentation (Android) and were quite satisfied: it proved good, complete, detailed, and clear. So it became another argument in favor of the implementation of ads from the InMobi.
We also liked the excellent settings for precise targeting and the possibility to specify each aspect of a user's character, including his interests or education.
In addition, we were impressed that each type of advertising has its own class of listeners with a large set of methods for tracking status and events: from onAdLoadSucceeded to onAdWillDisplay. Say, the abstract class InterstitialAdEventListener has 12 methods (at the time of this writing).
Well, last but not least: the SDK has built-in support allowing you to preload data for an advertisement (if necessary) and display it at the exact moment when you need it.
Of course, it wasn’t without challenges, but we successfully overcame them. And we'd happy to share our experience with you because it'll help you find out how to set InMobi in the easiest way… bypassing our troubles.
Pitfalls
When implementing a banner advertising, we decided to use XML for this purpose, but the SDK refused to load and display ads. Soon, we found out that the SDK repository had an unclosed GitHub issue related to the mentioned problem.
We didn't give up the idea to implement the banner, we just decided to perform the process differently: not in XML, but directly in the code. However, we were faced with another difficulty and discovered that banners could have only predefined sizes.
InMobi recommends using 320x50 proportions (in its numerous examples, the platform doesn't provide information about other alternatives). The size can be set via LayoutParams in dp, i.e. a banner has a size of 320dp x 50dp. As a result, it looks like this on a 360dp screen:

The banner looks quite satisfactory and doesn't serve as a reason to be disappointed in the ads from the InMobi, but we decided to bring the result closer to the ideal. After rigorous searches, we found a list of available sizes in the Mobile Web section -> Slot Size and empirically picked up the 468x60 option:

It looks much better, right?
If you set banner sizes different from those provided by default, the SDK will refuse to load data and will issue a corresponding message to the log:
[InMobi]: Failed to fetch ad for placement id: 201901231449, reason phrase available in onAdLoadFailed callback.
And the message “Ad request successful but no ad served” with the code “NO_FILL” appears in the listener's method. Hence our expert advice: always redefine the listener's methods which are responsible for errors. Acting such a way, you'll avoid many difficulties later.
The documentation recommends that you always have a strong reference to listeners and objects — containers of advertising data. Otherwise, with a high probability, you would receive the following message from the SDK:
[InMobi]: Listener was garbage collected. Unable to give a callback.
Afterward, we had no problems of the sort, and the SDK behaved as it should have done.
Our InMobi Integration Guide is complete now, and, we hope, it’ll be useful to you.